- Milkweed seeds can be collected from ripening follicles from mid-summer to late fall.
- The time frame depends upon the species and the location. July-August: California, Heartleaf, and Woolly
Milkweeds. September-October: Narrowleaf, Showy, and Woollypod Milkweeds.

Fig. 1. Narrowleaf Milkweed follicle with seeds and pappus (white fluff) emerging. Photo credit: Ted Barnecut.
2. Cleaning seeds:
-
The pappus should be cleaned from the seeds to ready them for stratification.
-
Elastic bands can be placed on unripe follicles to conserve seed for later collection.
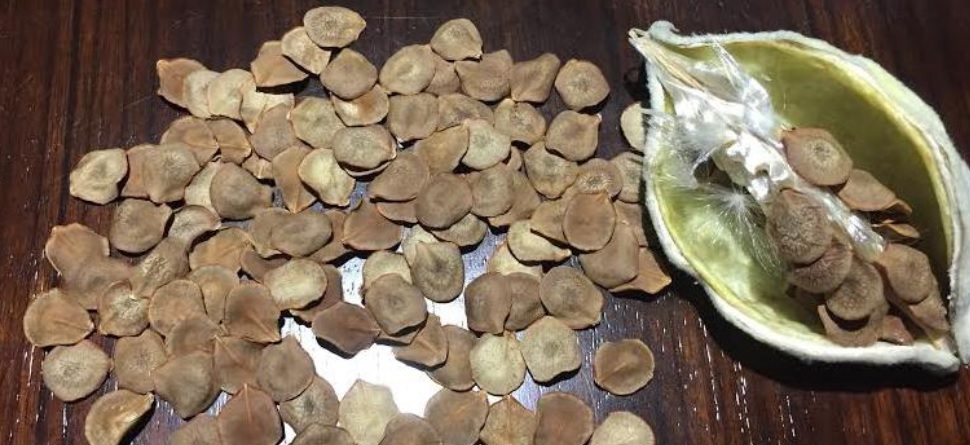
Fig. 2. California Milkweed seed pod with seeds cleaned of pappus. Photo credit: John Bliznak.
3. Collecting seeds from cut stems:
-
Nearly ripe follicles can be matured naturally indoors.
-
Collect a whole stem and place it into a vase with water.
-
Pods will continue to ripen and will begin to split in a few weeks. Seeds can then be collected.

Fig. 3. Woolly Milkweed and Woollypod Milkweed cut stems. Photo credit: Ted Barnecut.
4. Introduction to stratification:
-
Dormant Asclepias genus milkweed seeds benefit from a cold, moist stratification period. This
aids greatly in germination. In some cases, milkweed seeds will not germinate without such treatment.
-
The moisture maintains seed viability, and the cold temperature helps break the dormancy.
-
The stratified seeds need both warmth and light. After a stratification period of 30-60 days,
depending up the milkweed species, place the seeds in a sterile planting medium (e.g. vermiculite)
or soil in pots.
-
The germination containers can be Jiffy Pots, Cow Pots, party cups with holes drilled for good
drainage, or--these are probably the best--deep tree band containers.
-
Place the planted seeds in containers over heating mat (set to about 75 degrees F) to germinate.
The cold stratification followed by the warmth of the heat mat makes the seeds pop. If the weather is
warm, a heat mat is not necessary.
-
Once the seeds have germinated, remove them from the heat source. They now need bright light and
a moist growing medium.
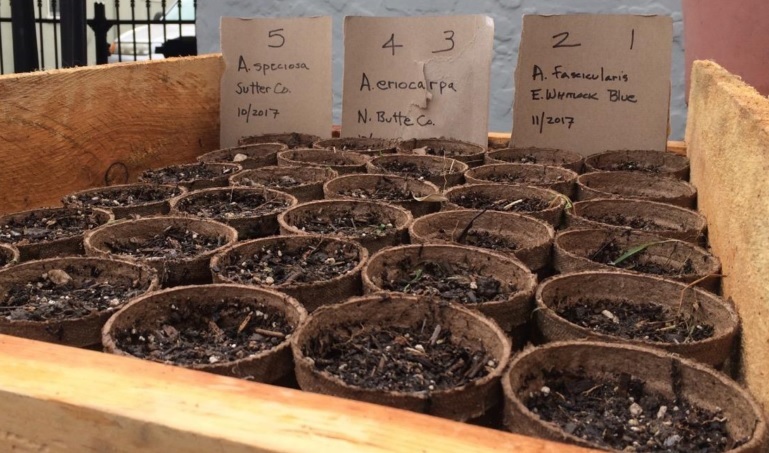
Fig. 4. Stratified milkweed seeds planted in Jiffy Pots. Photo copyright © 2018 Mariposa Native Plants.
5. Stratification procedure, materials:
-
Gather the materials for the stratification: Daconil fungicide; a sterilized, sealable plastic
container; paper towels or coffee filters; scissors; pen or pencil; a bowl of water; and some
tweezers.
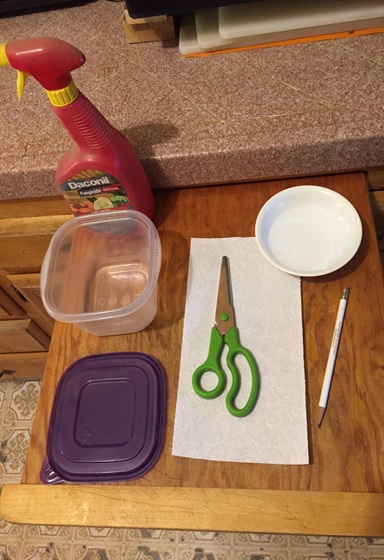
Fig. 5. Materials for stratification. Photo credit: Ted Barnecut.
6. Stratification procedure, fungicide treatment:
-
Add some Daconil to the bowl of water. If the Daconil is concentrated, dilute it by adding
1 teaspoon to 1 gallon of water and use that mixture instead of water in the bowl.
- The fungicide treatment is recommended, but optional. At Mariposa Native Plants, we have not
had problems with fungus growth in stratified seeds.
-
Cut the paper towel into rectangular pieces. Fold the paper towel over and label it with the
pencil for the seed species, the date of stratification, and the collection location and date
(if applicable). A Sharpie can also be used to label the paper.
-
Dip the paper into the water/Daconil solution, shake off excess liquid, and set the moist paper
open-face on clean plate.
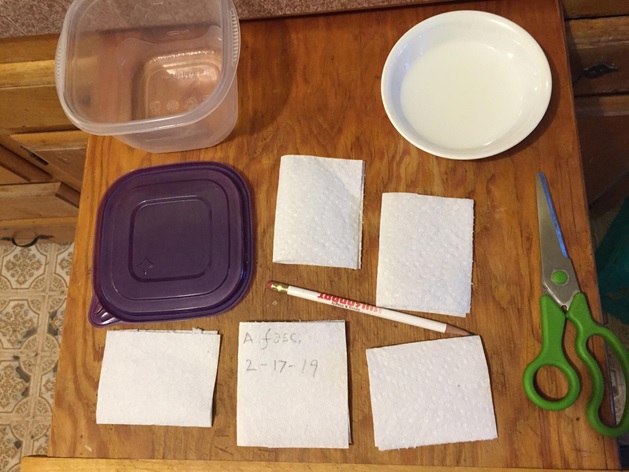
Fig. 6. Labeling paper sheets and fungicide treatment. Photo credit: Ted Barnecut.
7. Stratification procedure, seed placement:
-
Using the tweezers, place the seeds on one half of the paper. This can be done by hand, without
tweezers, but wash your mitts thoroughly before placing the seeds.
-
It's a good practice to separate the seeds, putting them perhaps 1/2 inch apart, so that in
case a fungus affects one seed, it does not transfer to the others.
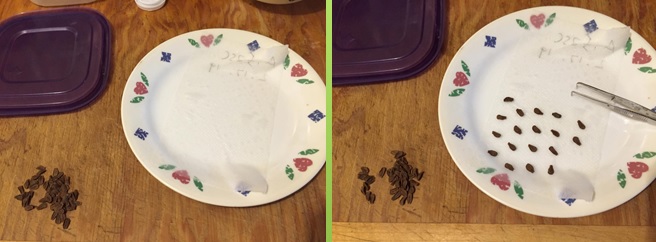
Fig. 7. Placement of seeds onto paper towel treated with fungicide. Photo credit: Ted Barnecut.
8. Place wetted seeds into container:
-
Fold the paper back over the seeds (Fig. 8, left); make sure the labeled side is facing up.
-
Place the seeds into a plastic container. Additional layers of seeds can be added.
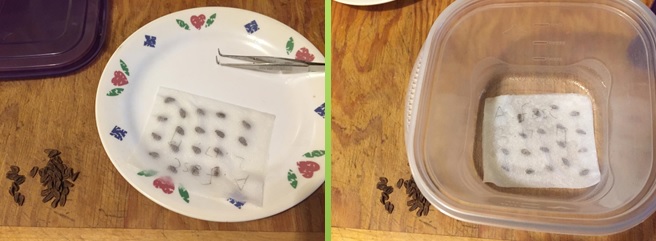
Fig. 8. Milkweed seeds, wetted, covered with paper, set into container. Photo credit: Ted Barnecut.
9. Container with stacked seed papers, ready for refrigeration:
-
Place each envelope labelled side up and at right angles to each other for easy removal later.
-
The lid is also labeled with seed ID and date and snapped on tightly.
-
Place the container in the refrigerator; don’t freeze it. It's a good practice to check the seeds each
week during stratification. Sometimes seeds in a packet will begin to germinate. In this case, the
seeds should be removed and planted into germination containers.
-
The stratification interval is important: Woolly and Heartleaf Milkweeds should remain cold for 60 days;
other milkweeds need only 30 days.
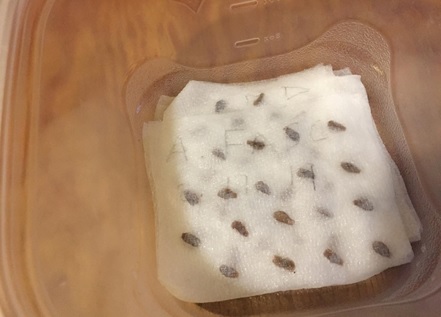
Fig. 9. Ready to stratify. Photo credit: Ted Barnecut.