Mariposa Native Plants: Native Plant Planting Advice
Planting a #1 (one gallon) nursery container plant in the ground:
- Select an appropriate location for the plant. Dig a square hole, roughly twice the volume of the
plant in the container, but a few inches deeper than the depth of the soil in the container. For
a 1 gallon plastic container, this would be a square hole about 9 inches across and about 10 inches
deep. (The reason for making a square hole is that this helps guide the plant's roots downward.)
-
Break up the soil from digging the hole and empty enough of it into the hole so that the depth of
the hole is now equal to the depth of the soil in the container. The objective here is to give the
plant's roots some soft soil to grow into, but to also level the plant with the ground surface. The
plant should not be in a depression after it is situated, nor should it be sticking up out of the
ground. If it is perhaps 1/4 inch above the surface, this is OK, and it assumes that with watering,
the plant will settle in to be level with the ground elevation.
-
Run a knife around the inside of the container to separate the plant's roots from the sides of the
container. Pinch the container so as to further loosen the plant from the container. Tilt the container
down and gently slide the plant out of the container. Don't pull too hard on the plant itself while doing
this; you don't want to pull the plant out from its root base in the container soil. Try to guide the
plant into the hole as you slide it out of the nursery can. Keep the root ball intact as much as is
possible.
-
Depending upon your local ecology, you may need a gopher screen for new plants. Consult Mariposa
Native Plants for the type of plant you're setting down and the prevalence of gophers in your area.
A gopher screen should be a square galvanized steel cage, about the size of the square hole, with
the mesh having holes no larger than 1/2 inch (1cm). Set the gopher screen in the hole. Ensure that
there is about 1-2 inches of screen sticking up above ground level. Why? Gophers do roam the ground
surface at night, but they don't ever cross over anything that would take them more than a few inches
away from ground zero. This keeps them from getting to your newly planted green thing above ground.
Some plants require a deer screen as well. Again, check with us at MNP for advice on thwarting deer.
-
Fill the hole around the plant with the crushed soil that you dug up from the hole. Now, this is
California: Do not add any soil amendments whatsoever! Native plants do not like them. If the plant
belongs at the site you selected, then it's going to be fine there. Gently press down the soil that
fills the hole, but don't smash it down, as that could injure the plant's roots. Make sure that the
level of the soil from the container matches the ground level, or, alternatively, that the plant is
sitting about 1/4 inch (5mm) above the ground elevation. This assumes a bit of settling after water
is applied.
-
Water the plant thoroughly, enough to saturate all the soil around the plant in the hole. It's good
to place some coarse mulch, about 1-2 inches deep, around the plant. Also, a nice flat rock is a
friendly thing to set next to the new plant. Both of these actions provide some cover for the plant
roots against the harsh afternoon sun.
-
Typically, water the plant about 1 gallon (4 liters) once every week for the first summer. Once
the first soaking rains arrive in the fall or winter, you can stop supplying supplemental water to
the plant. It will continue to put down roots over the course of the fall and winter. Come spring,
you should see emergent growth from the plant, and, with a few botanical exceptions, it should be
good to leave alone throughout the second summer.
Transplanting a seedling into a #1 (one gallon) container:
-
You might buy a plant in a small container, such as a small deep tree pot, a party cup, a cow
pot, or a Jiffy Pot. Or you could cultivate a plant in one of these small containers, and now
it's ready to move into a larger bucket. There are some things you need to take into account,
in order to get this right, however.
- Generally speaking, a native California plant in a container needs very well-drained soil. You
could start with soil that comes from your landscape, where you plan to put the plant into
the ground, or with commercial nursery soil for raised beds. Plain topsoil from a nursery is
too heavy for most California native plants, and it's best to mix it with some perlite or
vermiculite for use in a container. At MNP, we recommend that you use a special potting soil
mix, if you intend to use the commercial nursery soil for raised beds. This mix can be
formulated as follows.
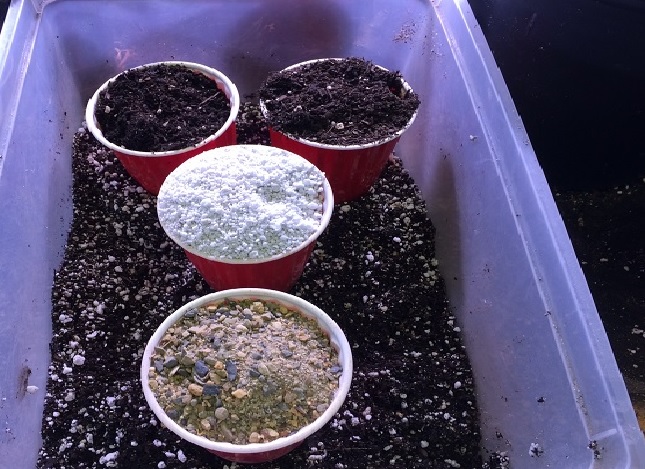
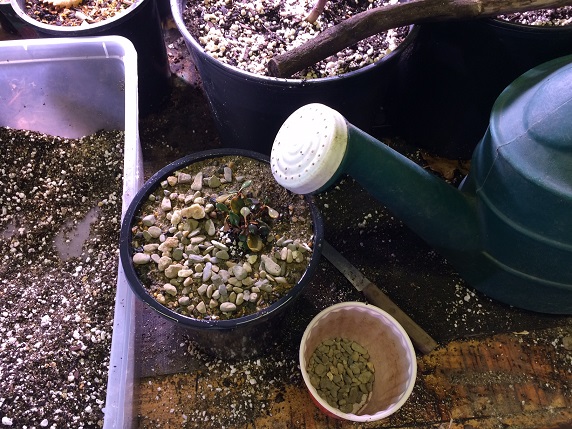
- You should start with raised bed soil, which has some perlite combined with it for better
drainage. Mix together two parts of raised bed soil with one part of perlite and one part of
clean sand (see photo above). This is Foothills Native Mix (FNM). If you have plain
topsoil, then mix in two parts of perlite into the mix, not just one. FNM is the basic
soil that you will use in repotting a seedling into a nursery container.
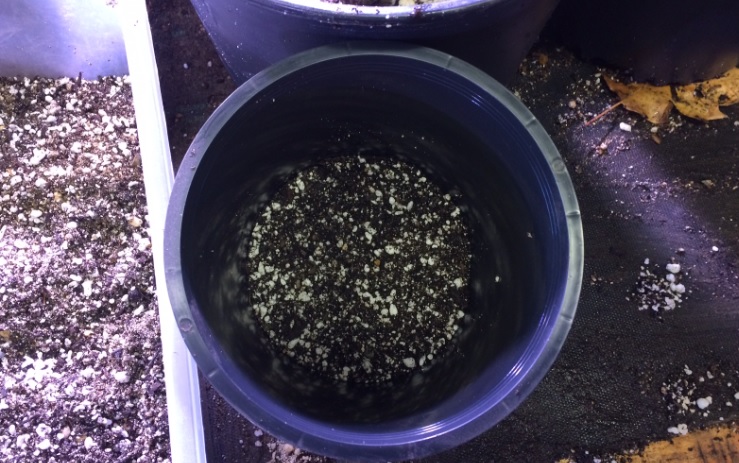
- Pack a layer of FNM into the bottom of the #1 container you're going to use. It needs to be
deep enough to cover the drain holes in the bottom of the can...maybe a bit more to account
for some further settling (photo below). The concept behind this is that a native
California plant in the wild will typically find different soil types in its root zone. The
bottom layer of FNM holds extra moisture for the plant's deeper roots.
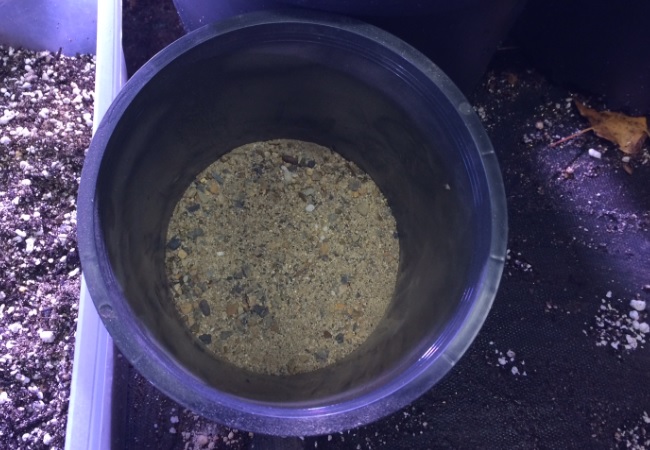
- Next, add a layer of clean sand to the container so as to completely cover, to a depth of
about 1/4 inch thick, the FNM bottom. The purpose of the sand layer is to allow water to
quickly pass to the bottom FNM layer and to keep the lower roots well-drained. If the plant
needs more water, it can penetrate its roots into the FNM layer below. And, if the plant has
adequate moisture, it can stop rooting at the porous sand layer (photo below), without
suffering from soil that is too soaked with water.
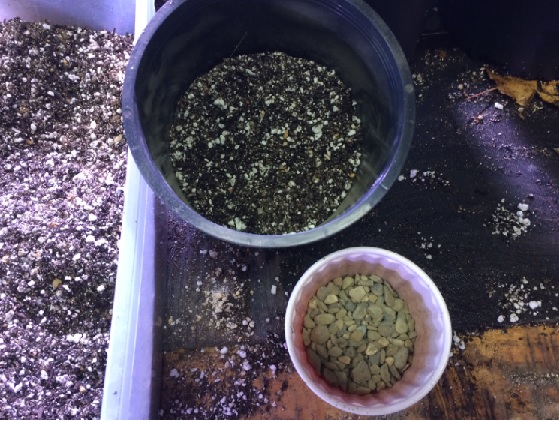
- Now, start filling the container with FNM native mix. You can add in some small rocks or pebbles
at this step, depending on whether the plant prefers a rocky soil environment (photo below).
Contact us at Mariposa Native Plants if you're unsure about whether the plant you're working with
prefers a rocky soil base. If you happen to be transplanting a native California milkweed in the
Asclepias genus, then you can plant Narrowleaf Milkweed and Showy Milkweed without adding
the rocks. The other common species of milkweeds, including Woollypod Milkweed, Heartleaf
Milkweed, and especially California Milkweed and Woolly Milkweed, are all happier with a few
pebbles thrown into their root zone. Just one handful of pebbles should be adequate. Some plants,
such as Canyon Dudleya (Live-forever), like lots of rocks; for this plant toss in two handfuls.
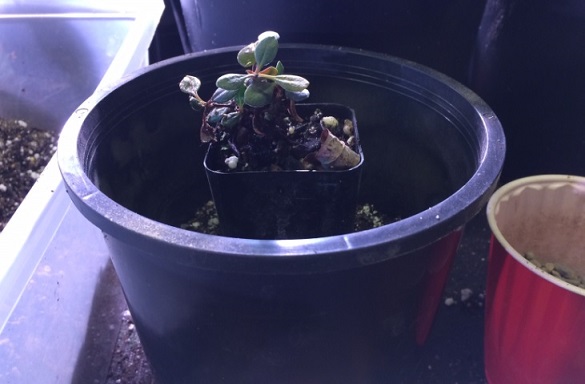
- Fill up the remaining volume in the container with FNM and your rock mixture, so that the
plant soil surface level does not change (photo below). If the seedling is sticking
up too high, then scoop out some of the soil mixture to lower it. And if the seeding is
sitting too low, then add some more FNM and rock mix so as to lift the seedling up to the right
level. It is best to have the final level of the soil in the container to be about 1/4 to 1/2 inch
(5mm - 1cm) below the rim of the container.
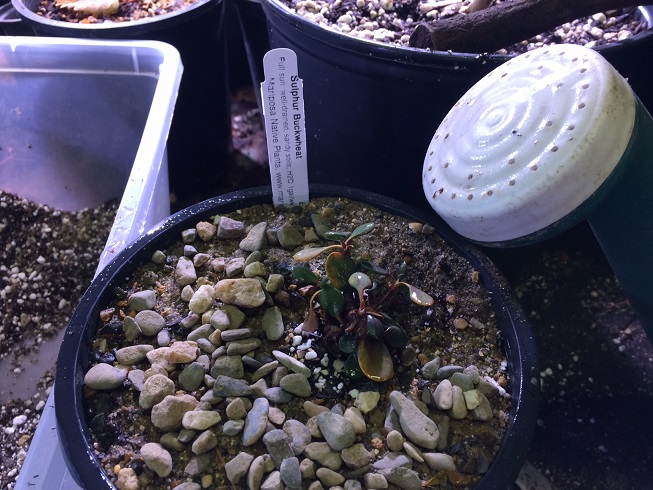
- Once the container is filled to a half inch below the rim, added a thin layer of sand over
the top. You can scatter a few pebbles over the surface if this is a plant that prefers a
rocky soil (photo below, showing a sulphur buckwheat). Water the plant well, allowing
the sand to dissolve into the top part of the FNM and rock mixture.
- Finally, add a label to the pot (photo below). Keep the black plastic of the pot out
of harsh summer sunlight. If the plastic gets too hot, it can burn the roots of the potted
plant. In the Sierras during the summer heat, it is often necessary to place a sunscreen
over a potted plant. This is a plastic mesh screen that transmits anywhere from 30-50% of
the incident sunlight. Typically, the plant needs to be watered once every two days while
in the pot.
Our plant list on Calscape's webpage: